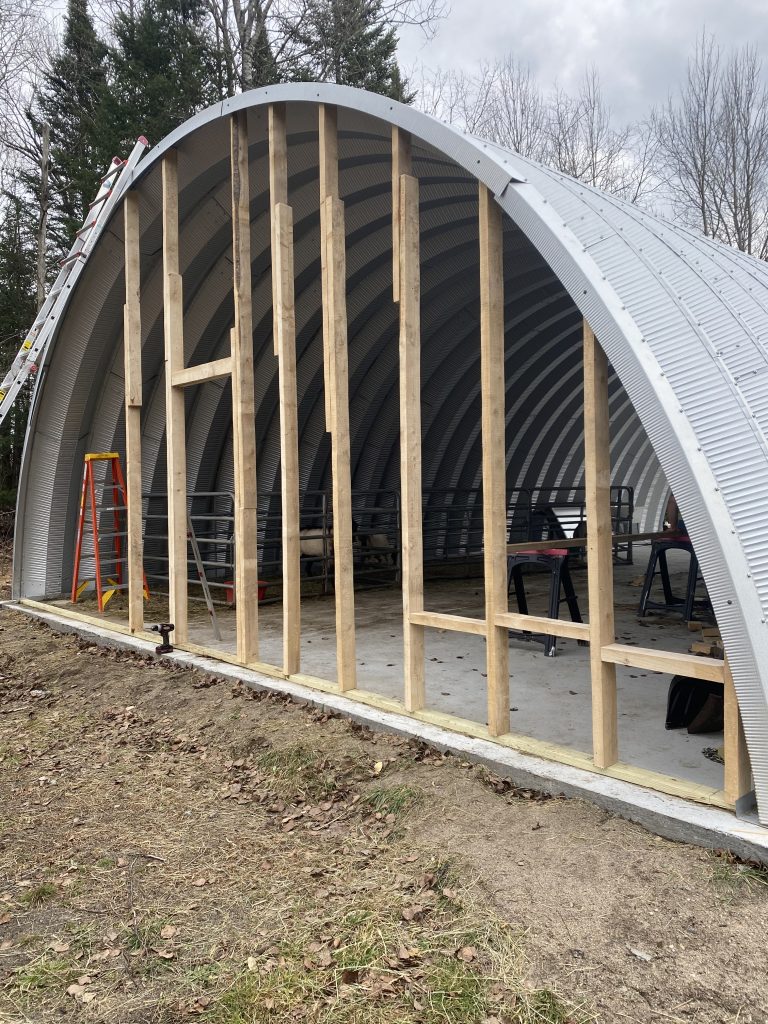
Once we finished assembling our quonset hut, the next step was to build the end walls. We opted to build our own, rather than purchase them as part of the building kit, so that we could completely customize the size and placement of the doors and vents.
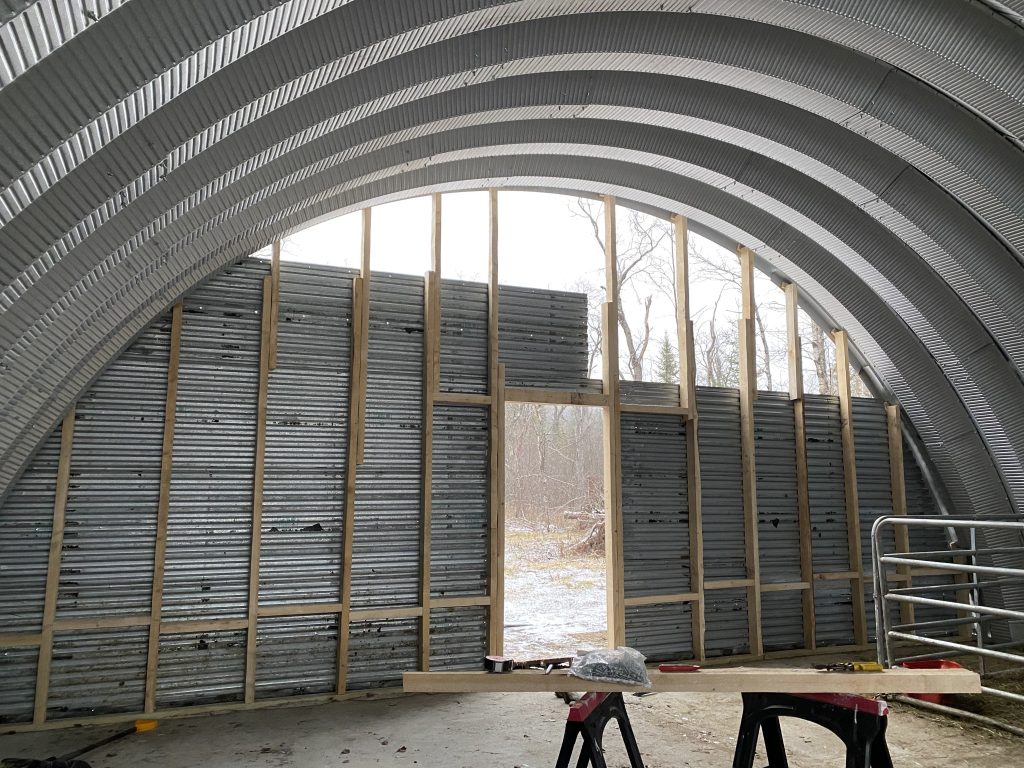
First, we screwed pressure treated boards to the cement to form a sill that we could build off of. We used our own rough cut lumber to frame the walls, doubling the boards in some places to reach the quonset hut’s 14’ peak (our sawmill only allows us to cut 10′ logs). Deciding how to secure the upper part of the wall to the curved metal structure was a bit tricky. We ended up putting roofing screws through holes that we drilled in the drip edge, which can be seen as little green dots in the photo below.
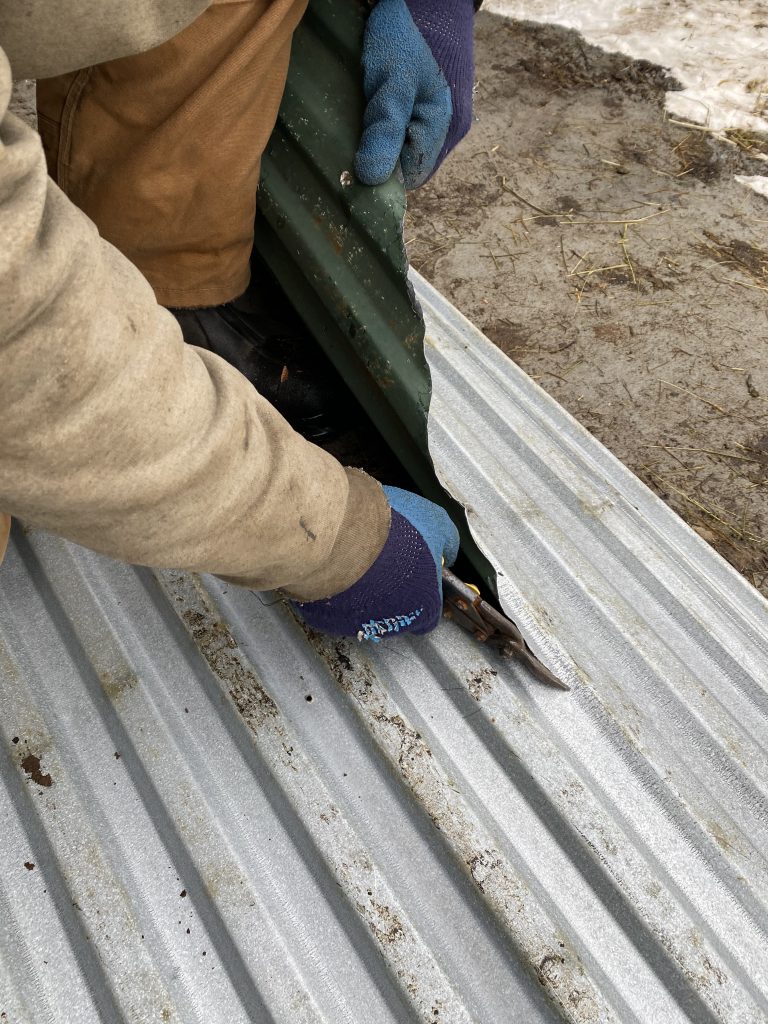
For siding, we used upcycled roofing steel. To get the steel to match the shape of the quonset hut, we had to carefully cut each piece. Brandon would stand on a ladder on the outside holding a sheet in place, while I stood on a ladder on the inside to trace the curve of the drip edge. We then cut along the line using tin snips.
Although you can see some light along the right side of the wall, the drip edge overlaps the cut edge of the roofing steel by a few inches, preventing water from leaking in. We will evaluate whether spray foam insulation is needed to fill these little gaps, and if necessary, we’ll tackle that project in the spring. For now we’re just focused on getting the building closed in to keep the animals out of the wind!
Thanks your pictures showed me how to do mine.
Glad we could help!
Very nice. I would expect the end wall sheeting to run vertically.
Im goin that way with the corrogated galvalum coated steel .
3 x 8 sheets with plenty of overlap.
Could I get a closeup photos of where the studs meet the steel arch? Thank you!
I’m so sorry, your comment got buried somehow and I’m just now seeing it! Do you still need photos? If so, please shoot us an email and we will try to take some for you.
Reading this thread, and if you have photos of where the studs meet the steel arch and how you anchored them I would GREATLY appreciate it!
Hi Heather, I’m unable to post photos in the comments here so I’m going to email them to you.
I like the corrogated siding ..im going with a up/down pattern . Lapping the 2×4 wall studs and no purlin wow. Code Enforcement the code here would fine me. Im overdoing it to avoid such ” judgement ” calls..
Im using 2×6 continous on 16 centers with purlin, lots of them. Bottom is treated double plate. 2×10 header on the door roughing with 2×6 s . Windows 3-1′ x 6 ‘ and 1 – 4′ x 6’ picture windows .
Plywood sheathing, R30 insulation Covered in Galvalum .
. The front wall is recessed 3ft. And SteelMaster has a trim that kills the rough edge on the front wall. This is gonna be interesting. Ill be watching for more ideas.
That sounds great, Wayne! We didn’t have any issues doing the end wall studs the way we did because the walls are non load-bearing. We don’t have to deal with code enforcement since ours are all agricultural building.